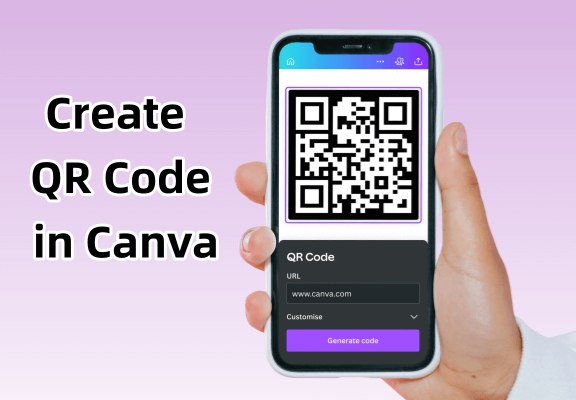
QR codes have become a vital part of today's fast-paced world. And Canva, an all-in-one online design platform, allows for the easy creation of all kinds of visual content. So can you create QR codes in Canva? Yes.
Combining the power of Canva with the functionality of QR codes opens up a world of creative possibilities. In this guide, we'll explore how to create a QR code in Canva to engage your audience. Get ready to unleash the full potential of Canva's tools and boost your brand's digital engagement.
Part 1. Understanding Canva QR Codes
Canva QR codes are scannable QR codes created using the Canva design tool. These codes can store information such as URLs, contact details, or text, and when scanned using a smartphone or QR code reader, provide quick access to the encoded information. Canva has simplified the process of generating and customizing these codes, making it accessible to users of all skill levels.
Part 2. How to Create a QR Code in Canva
The process of creating a QR code in Canva is very simple, and you can generate and customize it for a variety of purposes, such as directing users to a website, sharing contact information, or promoting an event.
Here is a step-by-step guide to help you create a QR code in Canva:
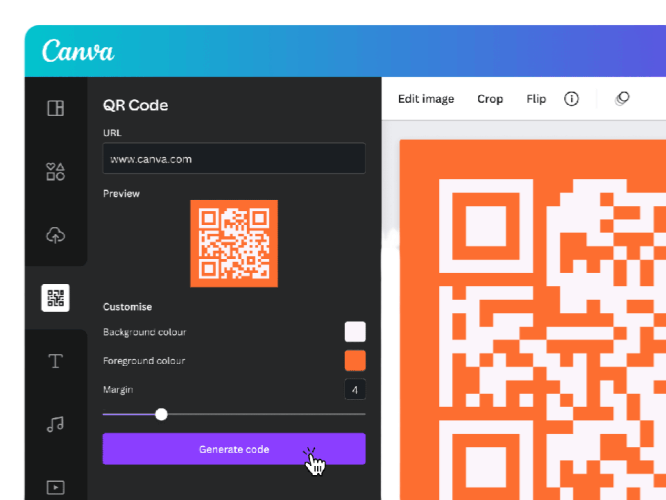
Step 1: Visit the Canva website or open the Canva app on your device.
Step 2: Click "Create a Design" and choose a template that fits your project, such as a flyer, business card, or social media post.
Step 3: On the left side of the Canva editor, click "More" (the icon with three dots).
Step 4: Select "QR Code", then enter your information and click "Generate Code".
Step 5: Once the QR code is generated, you can click on the QR code to place it in your design.
Part 3. Does Canva QR Code Expire?
QR codes generated through Canva do not expire. When you create a QR code in Canva, it encodes the information you provide (such as a URL or text) into a static QR code. This means that as long as the information the QR code points to remains valid and accessible, the QR code itself will remain functional.
View also: Does QR Code Expire?
However, there are a few things to be aware of:
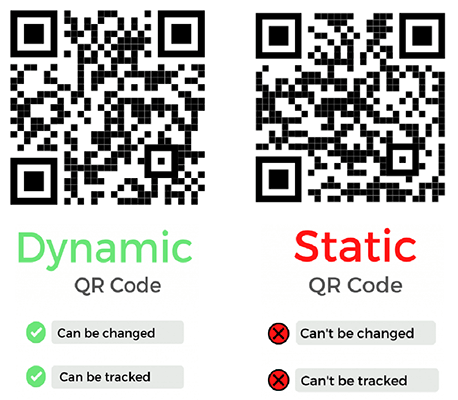
1. Static vs. dynamic QR codes:
Canva typically generates static QR codes. These codes have fixed information embedded in them, and the content cannot be changed after the code is created. As long as the linked content (such as a website) remains active, the QR code will continue to work.
2. Content availability:
If the QR code links to a URL, the code will only work while the URL is active. If the webpage is deleted or the URL changes, the QR code will no longer direct users to the intended content.
In summary, QR codes generated by Canva do not expire, but they are static codes and you cannot change the QR code content. If you want to arbitrarily change the encoded content after the QR code is generated, please continue reading.
Part 4. How to Generate Dynamic QR Codes for Canva
Dynamic QR codes offer the flexibility to change the destination URL or content without having to change the QR code itself. This is particularly useful for marketing campaigns or when the content of the link may change over time.
To generate a dynamic QR code that you can use in Canva, you can use the QRShow QR Code Generator by following these steps:
Step 1: Log in to the QRShow QR Code Generator
QRShow is a well-known QR code generator that offers dynamic QR code functionality. You can create an account for free by clicking the button below.
Step 2: Create a dynamic QR code
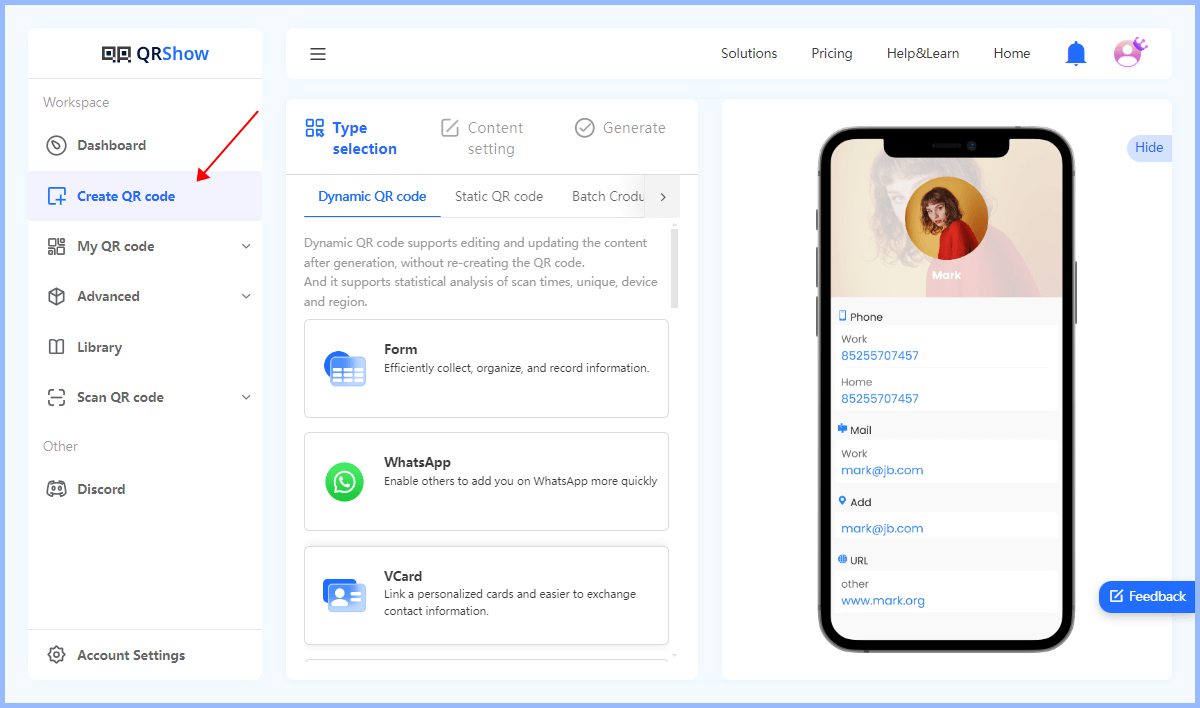
Once you reach the QRShow dashboard, click the Create QR Code option on the left. Select Dynamic QR Code and choose the QR code option you want to create. Then enter the required information. Remember, you can change it later if needed.
Optional: Customize the QR Code
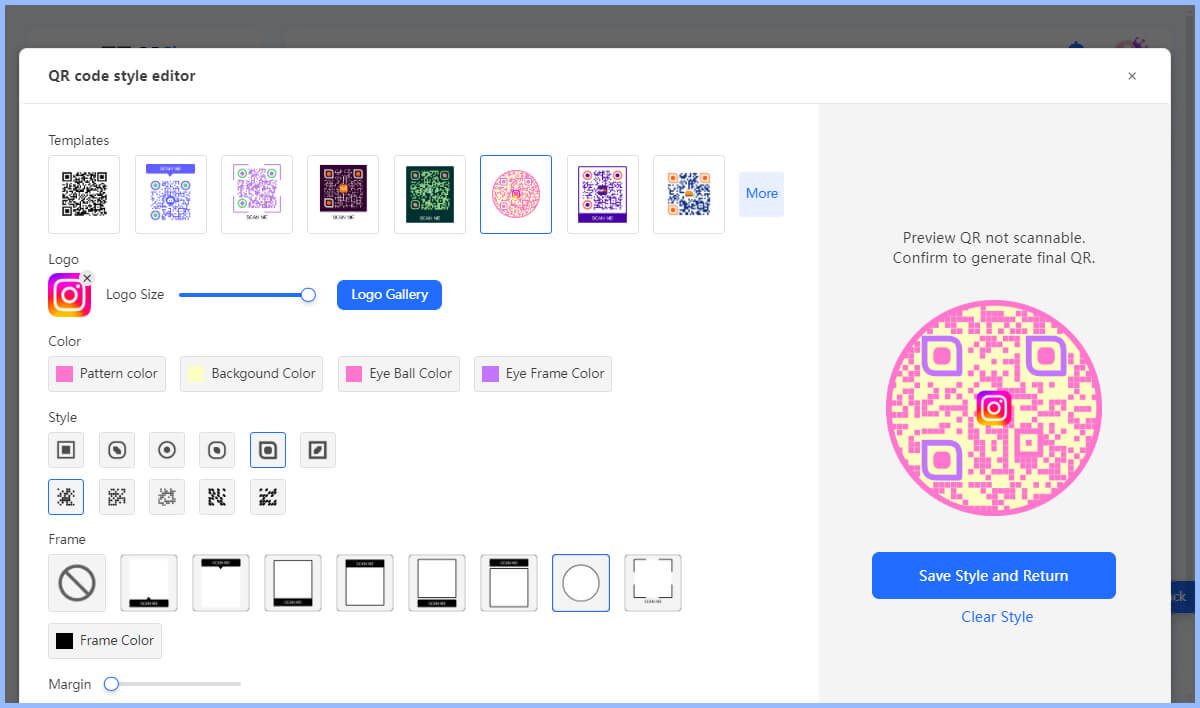
Click Customize QR Code to change the appearance of the QR code, including colors, frames, and adding logos. You can customize it to suit your brand or design needs.
Step 3: Generate the QR Code
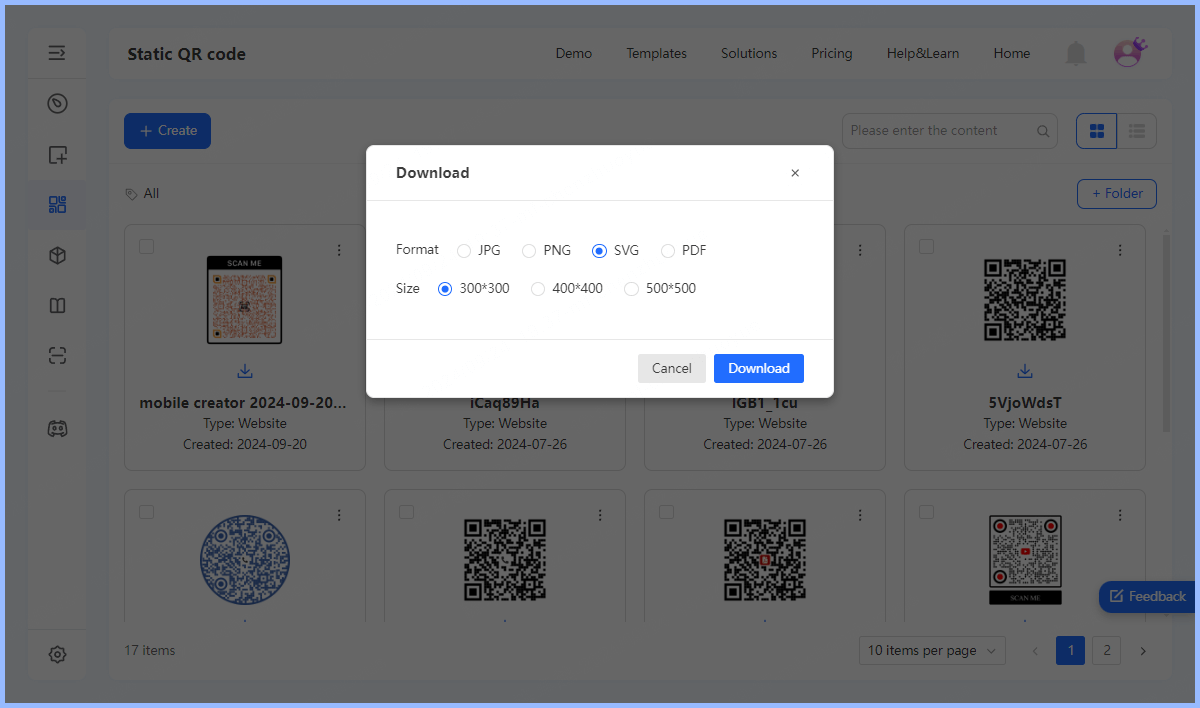
Once you are happy with your customizations, generate the QR code. Then save the QR code to your computer in a format compatible with Canva, such as PNG or JPEG.
Part 5. Best Practices for Designing Canva QR Codes
Designing a QR code can be a creative process, but it's important to follow best practices to ensure that your code is both aesthetically pleasing and functional. Here are some best practices to consider:
1. Ensure Scannability
Use high contrast between the QR code and the background to facilitate quick scanning. Additionally, you need to ensure that the QR code is large enough to be easily scanned. The recommended minimum size for printing is 2 x 2 cm (about 0.8 x 0.8 inches).
2. Be Careful with Customization
While you can customize the QR code's color, logo, and more, avoid using too complex designs that may affect the QR code's readability.
Once you've generated your QR code, it's a good idea to test it on different devices before distributing and using it to ensure that it works properly.
4. Provide Context
Add a short description or call to action near the QR code to let users know what content they can access after scanning the QR code (e.g., "Scan to visit our website").
5. Update the QR Code Content
The benefit of a dynamic QR code is the ability to change the destination content or URL at will after the QR code is generated. This helps you ensure that the QR code content is always valid and accessible.
6. Monitor Performance
If possible, use a dynamic QR code service that provides analytics such as QRShow to track how often the QR code is scanned. This can provide insight into user engagement and the effectiveness of the campaign.
In Conclusion
In short, creating a QR code in Canva is a simple process that combines the platform's user-friendly design tools with the practical functions of QR codes. Just follow a few simple steps and you can generate a QR code that is both beautiful and meets your needs. However, it only supports static QR codes. If you want to make a QR code that can change the content of the QR code at will, you can use the QRShow QR Code Generator.





Rated Successfully!
You have already rated this article!