Imagine turning your product labels or marketing materials into interactive gateways that lead customers directly to your website, promotional offers, or social media pages. It's a way to greatly improve marketing effectiveness. Today we show you a comprehensive step-by-step guide on how to create QR code labels for your business!
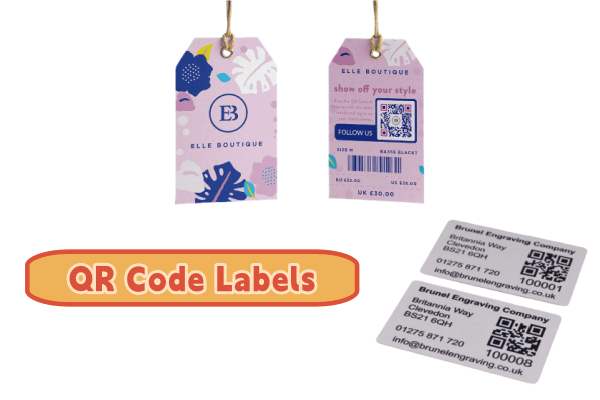
Part 1. What Is a QR Code Campaign?
QR code labels are two-dimensional barcodes that can be scanned using a smartphone or other device. Unlike traditional barcodes, which can only store up to 25 characters, QR codes have a significantly larger capacity, holding up to 2,500 characters. This enables them to encode a wide range of information, including URLs, product details, contact information, and more.
Part 2. Benefits of Using Labels with QR Codes
QR code labels offer numerous benefits to businesses across industries:
Enhanced Customer Engagement: QR codes give customers quick access to more product information, promotional content, or interactive experiences.
Improved Inventory Management: Businesses can use QR codes to track and manage products more efficiently, streamline operations, and reduce errors.
Data Collection and Analysis: Dynamic QR codes allow businesses to track scans and collect valuable data about customer behavior and campaign performance.
Cost-Effective Marketing: QR codes offer an affordable way to connect print and digital marketing efforts and deliver measurable results.
Part 3. How to Create Your QR Code Labels
Creating a QR code label for your business is a simple process that can significantly enhance your marketing efforts and customer engagement. Here is a step-by-step guide to help you create an effective QR code label:
Step 1: Choose what you want to link to
Before you start creating a QR code, you must determine its purpose. Ask yourself: What do you want the QR code to link to? Website, social media, product information, promotional offers, video content, etc. Then prepare your content so that the QR code can be generated.
Step 2: Choose a QR code generator
Choose a reliable QR code generator that suits your needs. There are many options online, and we use QRShow QR code generator here, which includes features such as customization options, tracking capabilities, and ease of use.
Step 3: Enter your data
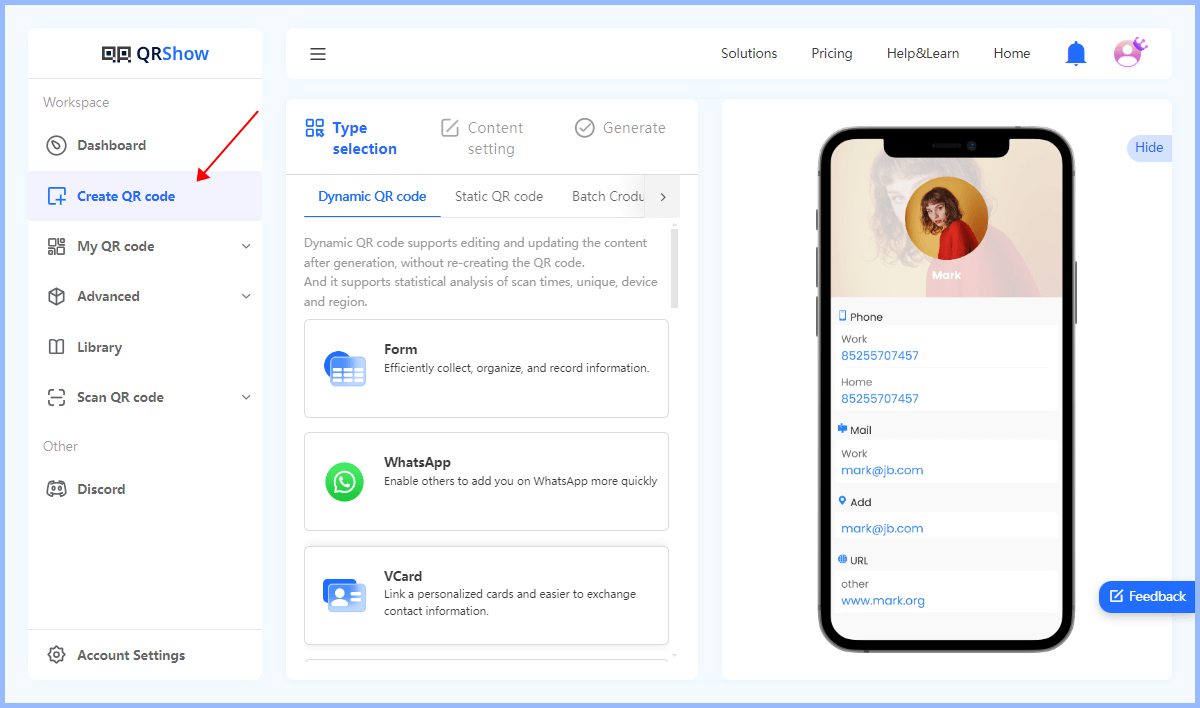
Click Create QR code and select the type of QR code you want to create. Enter the information you want the QR code to link to.
Optional: Customize the code
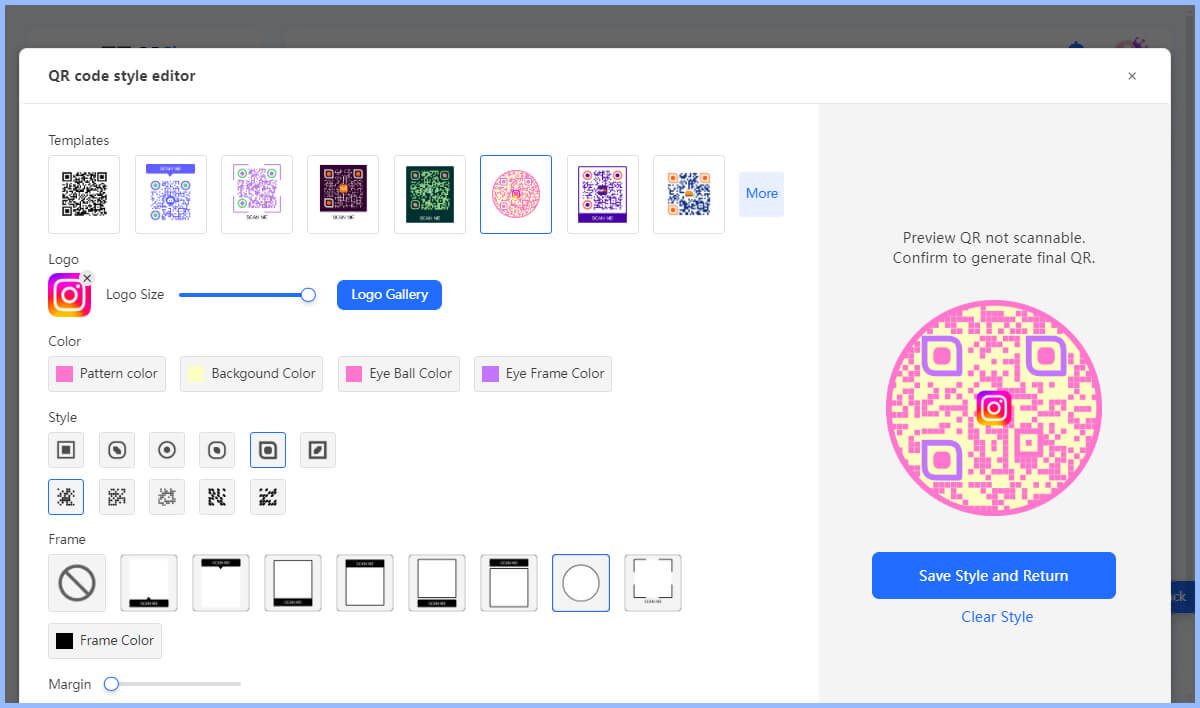
If needed, you can customize the appearance of the QR code by changing the color, adding a logo, or adjusting the design. You can add your business logo, colors, and any other branding elements to make the label visually appealing. Also consider adding a short description or call to action, such as "Scan to learn more!" or "Get exclusive offers!"
Step 4: Generate and download QR code
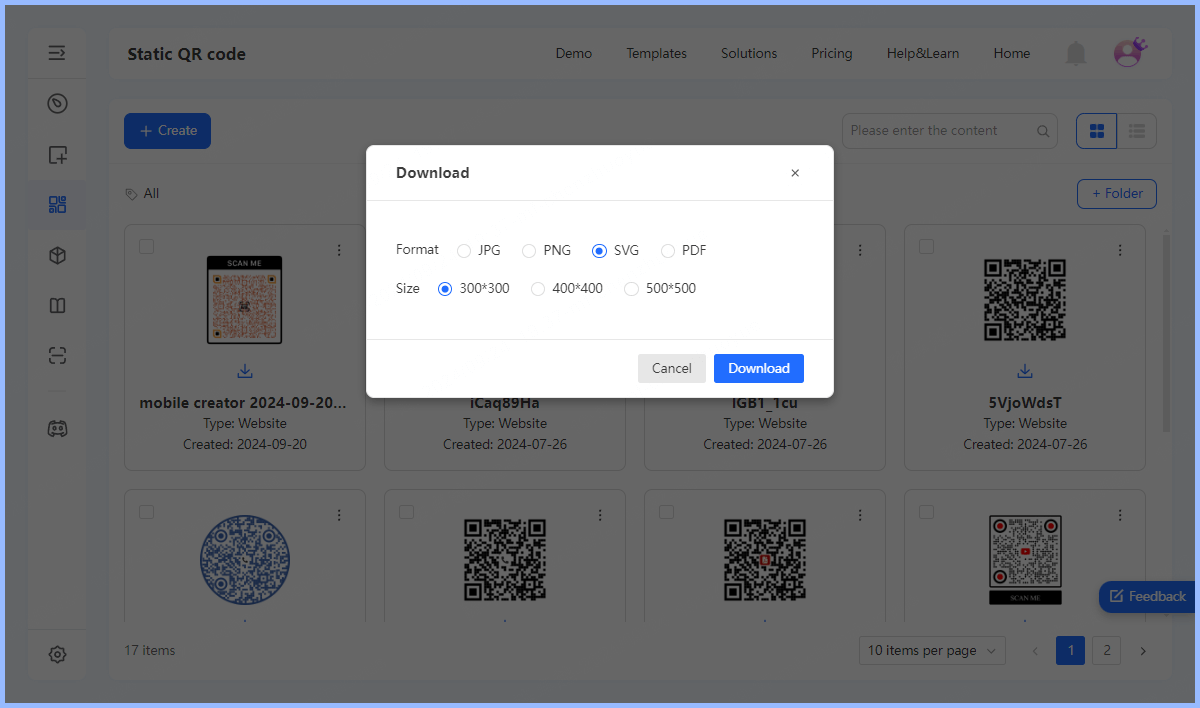
Click Generate to generate a QR code in one click. Remember that it is important to test your QR code label before finalizing it. You can determine the size of the QR code based on where the label will be placed (e.g. product packaging, business cards), and choose the appropriate format to download.
Step 5: Design and print the label
Now that you have a working QR code, it's time to design your label. Once the design is completed, it's time to print:
Part 4. Best Tips for Implementing QR Code Labels
1. Design of the QR Code
While functionality is critical, the visual appeal of a QR code can also have a significant impact on its effectiveness. The QRShow QR Code Generator offers customization options that allow businesses to align their QR codes with their brand identity.
Consider the following points when designing your QR code label:
Size: A minimum size of 2 cm x 2 cm (0.8 in x 0.8 in) is recommended to ensure scannability.
Color: A high contrast between the code and the background is essential. Black on white generally works best, but brand colors can be incorporated if they maintain sufficient contrast.
Logo Integration: Some generators allow you to add a logo or image to your QR code. While this can enhance brand recognition, it is important to thoroughly test the code to ensure it remains scannable.
Error Correction: If the code is in an area that is susceptible to damage or wear, choose a higher level of error correction.
2. Generate and Test
Once you have designed your QR code, it is time to generate and test it. QRShow allow users to download the QR code in a variety of file formats, but it is best to use a vector format such as SVG to maintain quality when resized.
Testing is a critical step that can't be overlooked. Before printing or distributing QR code labels, scan them using multiple devices and applications to ensure they function properly across different platforms.
3. Printing and Application
When choosing labels, consider the environment in which they will be used. Thermal labels are a great choice for QR code labels because they are water and oil resistant and more durable than paper labels.
4. Monitor and Analyze Performance
One of the significant benefits of QR code labels is the ability to track and analyze their performance. Leveraging QR code analytics can provide insight into how your labels are being used. Key metrics to monitor include:
Total Scans: Shows the total number of times a user has scanned your QR code, including multiple scans by a single user.
Unique Scans: This metric is critical for measuring conversion rates and understanding how many individual users have interacted with your QR code.
Scan Location and Time: This data can help you understand where and when your QR code is being used most often.
In Conclusion
In conclusion, creating QR code labels for your business is an innovative and effective way to do so. By following this step-by-step guide, you can design QR codes that not only serve a practical purpose but also enhance your branding and marketing efforts. Embrace this technology and watch how it changes the way your customers connect with your brand!




Rated Successfully!
You have already rated this article!